Search This Blog

Showing posts with label teaching. Show all posts

Saturday, December 17, 2016

Easy Print-Making: great holiday art activity for home or school

Print-making is a fun and versatile art activity that can be easily modified for all levels of language and artistic skill. The method demonstrated in our teaching video (see link below) is simple, allowing you to set up a print "studio" at home or in the classroom without spending a large amount of money.


You will need:
  • styrofoam trays (from meat and produce at the grocery store) - clean these well with soap & water, and make sure they are completely dry before you use them
  • wooden skewers or pencils - these are used to "draw" the designs into the styrofoam trays (making an indentation)
  • paint trays - we used cookie sheets covered with tinfoil (foil secured to the tray with masking tape)
  • water soluble print ink - you will have to purchase this at the art store (we used Speedball block printing ink and Nobel LinoPrinting ink)
  • paint/print rollers - these are also purchased at the art store, they are durable and made for multiple use (ours were Speedball brand, you'll find them with the print supplies)
  • paper - many kinds of paper will work, so feel free to experiment - in the video we used paper that we already had on hand (cartridge paper, rice paper, black art paper)

Basic method:

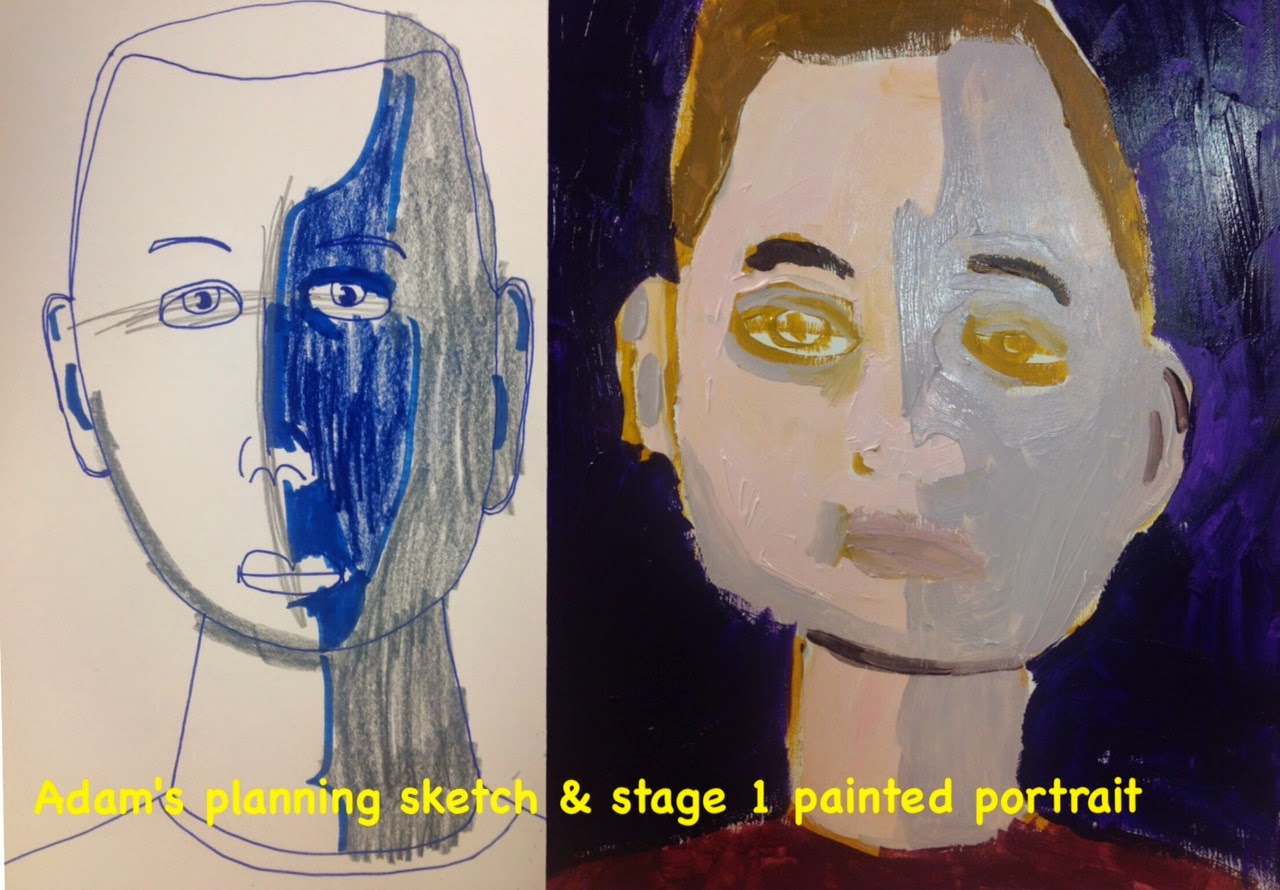
Draw out design ideas on sketching paper. Adam used markers to do this, but you could also use pencils - the advantage of drawing with markers is that it reduces the urge to constantly erase and "fix" a drawing.

Transfer the drawing ideas you like to the styrofoam trays (cut off raised edges so you are working with a flat piece of foam). This is where you will use a wooden skewer or pencil to press/indent the lines of the drawing down into the foam to create a "relief" drawing. Make sure the lines are indented well so that you get a clear print. The paint will stick to the areas around the lines.

Mix your paint on the paint trays. If you have multiple people using the trays, try to keep each tray to a colour "palette" that includes no more than 2 primary colours (eg. red & yellow, yellow & blue, blue & red) so you don't end up with "muddy" colours as they mix. That being said, have fun mixing your colours and also experiment with adding white and black ink. Print plates can easily be cleaned by running them under a tap. Or you can layer ink colours on the same print plate without cleaning in-between to get a different effect. There's no wrong answer here.

Use a roller to mix and transfer the paint to the styrofoam print "plate". Then you can either place the print plate paint side down on the paper & flip both over so the paper is on top, or you can put the paper on top of the print plate (whatever works out easiest for the person you are working with - the first technique allows better control over where the print is on the paper, but adds the potentially tricky motor step of flipping paper & print plate together without smearing/smudging the print).

Then use a clean roller (not the one you used to apply the paint) and roll on top of the paper to transfer the ink from the print plate to the paper. You can check the print by placing a finger in the middle of the paper and carefully lifting up one edge (to see if enough ink has transferred to make a clear design). Remove the paper carefully so the print doesn't smudge/smear. Then set it aside and let it dry.


Watch the video for more ideas on how to use this basic print technique to get many interesting effects:


if video doesn't play in your browser click this link: Print-making with Adam


Have fun and Happy Holidays from Autism and the Art of Communication!!

Wednesday, May 4, 2016

Teaching Nonverbal and Less Verbal People - Adam paints a self portrait

"Live as if you were to die tomorrow. Learn as if you were to live forever." 
~ Mahatma Gandhi

Adam writes and draws about our portrait painting class

Adam is an intelligent young adult on the autism spectrum who is less verbal and uses drawing and other art forms for communication. I first met Adam when he was just 3 years old and profoundly nonverbal. My job as a speech-language pathologist was to help him learn to connect and communicate with the world around him. What actually happened over the next couple of decades was more interesting - as much as I taught him, he taught me more. So at this point, I'll say that together Adam and I have discovered some effective ways to get around the barrier of imperfect verbal communication and give voice to the intellect and creative soul within. With Adam's permission, we now share some of what we've learned.


In the Art Studio:

Portrait teaching setup (Adam's easel on the left, my instructional model on the right, iPad photo reference and painting materials in the center)

You need a space that is friendly and comfortable for the student. The art studio we are working in is one that Adam's dad set up for Adam and his mom (who is also learning to paint). We have a generous work surface so that materials can be visually set out in an organized way. There is room for Adam (a tall guy) to step back and move around. Also important to consider lighting (need to see clearly, but not aggravate sensory sensitivies), sound environment (reduce background noise) and air quality (allergies, eg. free from mold & mildew).


Below are links to the two instructional videos that we made from our recent portrait painting sessions (posted on our YouTube channel AUTISMartCOMMUNICATE). These videos highlight and demonstrate some effective teaching strategies when working with less verbal individuals, including:

  • use of visual demonstrations
  • working from visual models
  • effective use of the iPad as a visual tool (takes & displays photos, allows zooming in on specific details)
  • verbal language should be clear, slow-paced and match demonstrated actions
  • back up verbal language with visual supports (to improve comprehension)
  • allow time for processing of verbal questions and instructions
  • repetition and rephrasing (of key information) can be helpful
  • resist "chattering" (remind yourself to leave quiet spaces)
  • SHOW more than TELL
  • gentle "hand over hand" can sometimes be useful when teaching a new motor skill
  • simplify language without "talking down"
  • allow the student to work at their own pace (don't rush)
  • student should be mostly calm, relaxed and enjoying the experience
  • okay for students to talk to themselves as they work
  • specific to portrait painting, be aware that autism can affect the individual's ability to process the human face
  • balance direct instruction with developing the student's artistic expression & style
  • art activities are a good context for language learning 
  • assume competence (and that all of your words are received and understood)


Part 1 (from the first hour-long painting session):


(if the video won't play click this link: Adam paints a self portrait - part 1 )

And Part 2 (from our second one-hour portrait painting session):


(if the video won't play click this link: Adam paints a self portrait - part 2 )


We hope you find these videos helpful and that you try out some of the methods in your own classes and studios. There is a lot of untapped artistic potential in the autism population, and many new artists waiting to learn new ways to express themselves. We would love to hear about your experiences.


We'll end this post by sharing Adam's completed self portrait. He has a bold and expressive artistic style that comes through in all of his art work, and is all his own. I love it:

Self Portrait by the artist, Adam V

Thursday, June 12, 2014

Art Lessons for Less Verbal People: painting self-portraits

 
~ this post is dedicated to (and prompted by) Raymond, Kevin's brother and #1 art fan, who reminded me that lately I've been neglecting the blog ~


This has been a very creative spring for Kevin and Adam. I've been wanting to share what we've been up to, but have been so busy doing art that there's been little time left over to write about our artistic ventures and adventures. In keeping with the creative mindset, we're not going to worry about timeline, and lessons will not be presented chronologically, but instead will be ordered by the whims of my right brain.


Note: when teaching art to students (of any age) who are less verbal, it's important to show more than tell. I use a technique I call "Follow Me" (modified from teaching strategies described in Mona Brooke's excellent book "Drawing with Children") to introduce new art media and techniques. For more on this method, take a look at this video from our YouTube channel:


And so, we start at the most recent project, self-portraits.


According to my art teacher (at the Ottawa School of Art), one reason for starting portrait painting with a self-portrait is that the face is very familiar to you. Often artists will create complicated set-ups of easels and mirrors to make it possible to paint on a canvas and refer to the "live model in the mirror" without moving around. We simplified this process (and eliminated the need to stay in one spot) by using the "mirror photo" function on the iPad.

Here's Kevin's iPad photo that he used as a model (we set up our photo so that the source of light was clearly from one side, to simplify the light and shadow):


Next step was to have Kevin do a spontaneous drawing of himself from the photo. When he did this, he made himself in "cartoon" form (which is how he frequently draws himself and family members in our language exercises):


For the next step, Kevin and I drew a side-by-side "guided" drawing, where I brought Kevin's attention to the lines, contours and shadows on the actual photo of his face. This is the "planning" drawing he produced:


Then we started in with paint on canvas. Following the method of my own painting teacher, we made a "paint sketch" with yellow ochre (no pencil lines to paint over later). Then we blocked in the shapes of skin, hair, shirt and background, as well as the areas of light and shadow. By the end of our first session, this is what Kevin's painting looked like:


You can still see some of the yellow ochre sketch lines around the eyes, eyebrows and mouth. With acrylic paints, it takes more than one layer to get vivid colours - this project was the first time that Kevin left a painting incomplete with a plan to finish it the next week (we made this clear before we started painting, so that he was prepared to leave it half-done - another important art lesson tip is "no surprises").

The next week, we added more layers of paint, more details, more light and shadow. And here's the completed self-portrait that Kevin painted (I love the personality that comes through in this painting!):


Adam was involved with some Picasso lessons (more on that in a later post), and so did his self-portrait later in the spring than Kevin. Here are the stages of Adam's self-portrait, and you'll see that although the teaching method was the same, Adam's style and personality results in a different type of finished painting:


One final note:
 
always very interesting to me how my "model" drawings and paintings are somewhat mechanical and bland, but the drawings and paintings produced by my students have personality and quirkiness and life to them ...
I'm giving "visual instructions" and they're expressing themselves with art ... so cool
 
 
Stay tuned for more lessons (how am I doing Raymond?)
......... Sheila B

Saturday, February 8, 2014

Teaching Art to Students on the Autism Spectrum: Follow Me!

Art washes away from the soul the dust of everyday life ~ Pablo Picasso
 
 
If you've been following this blog, you'll know that I recently went back to art school ... best thing I could have done to dust off my mental health and start the new year with a fresh perspective. A bonus side effect is that I'm learning new things that I can share with my students on the spectrum.

"Artist" by Adam


I've written previously about the methods I use to teach art to students with a wide range of communication profiles:
Click here to read my previous post on art instruction methods

The method I refer to as "Follow Me" involves sitting side-by-side with your student, demonstrating new materials and techniques step-by-step - showing rather than telling.
Click here to watch a short teaching video demonstrating the "Follow Me" method of art instruction


The class I'm taking at the Ottawa School of Art is an introduction to painting with oils and acrylics, and over the past few weeks, Kevin and Adam have also been learning about how to paint with acrylics, starting with a review of colour mixing and light and shadow (concepts we first introduced when they were in high school art class). We use our art sessions as an opportunity to extend language skills (vocabulary and concepts).

Here are some pictures Kevin drew of cartoon Mr. Bean and Teddy going to art school and learning colour mixing:

drawn by Kevin (Jan 2014)
 
drawn by Kevin (Jan 2014)

drawn by Kevin (Jan 2014)

drawn by Kevin (Jan 2014)


And now we've moved on to painting still life compositions on canvas boards, using artist quality paints and easels (if you want your students to love making art, you have to give them good quality materials to work with).

Here's some photos of Kevin and I during a recent therapy session:


Kevin and I sit side-by-side, both of us painting the still life - Kevin follows my model
I help Kevin to see the light and shadow in our still life composition by pointing it out directly
 
Instead of a lengthy verbal explanation, I show Kevin how we can use paint to create shadows


We both step back to admire our paintings - I love seeing Kevin's obvious pride and joy in his artwork
Fruit still life painted by Kevin (Jan 2014)


And don't forget to tailor your student's art projects to their personal interests and favourite topics - let your art sessions be an opportunity to express passion for what is dearly loved and wash away some of the "dust of everyday life".


Kevin's second still life features his beloved Teddy (who looks exactly like Mr. Bean's Teddy)


It would be possible to describe everything scientifically, but it would make no sense; it would be without meaning, as if you described a Beethoven symphony as a variation of wave pressure ~ Albert Einstein


Thursday, September 26, 2013

Classroom Solutions - helping noise-sensitive students to cope

September can be a difficult month in the school system, as everyone (students, teachers, parents) gets used to new classrooms, new groups, and new expectations. 


This picture, drawn by Owen (and used with his permission), for me perfectly encapsulates the feelings of distress and irritation that can develop on all sides of the classroom dynamic, especially during the early weeks of the school term.


Here are some ideas to help you and your noise-sensitive students through any current rough spots, while laying the ground-work to create a learning environment that will be effective for the school year ahead:

1. Look at the problem from all sides:

Owen drew his perspective for me, clearly showing that he felt his noisy classroom situation was not working out for him, but also not working for the other students and the teacher. During our discussion, we used clues and tried to "guess" what was in the minds of the other people in the situation. This helped Owen to understand why some of the other students might be distracted and having trouble settling down to work, also why the teacher might be finding it frustrating as well (trying to teach when people weren't focused and listening).

It was important to him that I shared his drawn perspective with the teachers, so that he was sure they were aware of how upset he felt.

2. Figure out what you control and what you don't:

This is a critical part of the problem-solving process, because anger and frustration are driven by feeling powerless to change a difficult situation. Finding out where your power is (what do you control?) gives a starting point for effective solutions.

Here is a simple visual that I have often drawn for my students to show them what they control and what they don't:


Essentially, you have direct control over everything that is connected to your brain - your thoughts/feelings, your words, your actions. Your words and actions may "influence" another person's choices (this is the world of social cues), but you can't control what another person chooses to do, say, think or feel.

* aside: it's interesting how often I have to remind myself of this exact thing when I'm sorting out difficult situations in my own life *

3. Define the problem and generate a list of possible solutions:

Owen is extremely noise sensitive and his ability to process spoken information in the presence of background noise is not strong. The classroom was noisy and several students were being disruptive. Owen was able to define his core problems as: (1) clearly receiving the teacher's lesson and instructions, and (2) being able to focus and do his work.

Once we had clarified what the real problems were, Owen and I were able to come up with a list of potential solutions:

 
Notice that all of these strategies have to do with things that Owen has direct control over in the situation - they let him know that he does have power to change things for the better.

4. Get help for what is out of your control:

Even with the above solutions, this is a difficult on-going situation for Owen to manage (noise is a huge irritant that disrupts his thinking). Owen and I have known each other a long time, and he has confidence that I will act as his advocate and "go-between", explaining his distress to the other adults. He also has great confidence in the teachers at his school - they have helped him solve difficult situations many times over the years, and he is 100% certain that they "have his back".

True solutions to challenging school situations require on-going collaboration between the student, teachers, parents and any other professionals involved. Keeping good lines of communication going helps everyone to stay calm and have confidence that solutions can be found (no matter how difficult the events of the day may have been)

Thursday, May 16, 2013

Drawing out Emotion in Autism

The other day I was asked this question:
Do people with autism understand love? How about emotions in general?


And this was my answer:
Yes – I’m actually just in the process of writing a blog post about this topic. It is a common misconception that people with autism lack emotion. In fact, they tend to have very strong emotions that can overwhelm them. Often emotions are not well categorized and sorted, and one of the important things to address in intervention is understanding, sorting , naming of emotions, as well as defining degrees of emotion – this helps the person deal with their own emotional responses (and those of others) in a better way.

Emotions can be hard:
 
 
..... especially if: when you feel like this inside .....


.... THIS is the only answer that comes out when someone asks: "How are you?"


Note to all parents, teachers & therapists: PLEASE do not teach a child to automatically answer "I am fine" to this common question (this response is incredibly difficult to un-teach, and results in sick/injured/hurt/distressed people telling you they are just "find")


Think of a time in your life when your emotions overwhelmed you - when events in your life were so "big", so unmanageable, so unfathomable that you were swept away by a tide of emotion that rendered you speechless, thoughtless, disorganized and discombobulated - perhaps to the point that a pathetic word like "sad" or "angry" or "scared" just wouldn't begin to encompass the experience. I really want you to clearly recall this time and state before you read any more .... ready?

This is often what emotion is like for those on the autism spectrum. Not too little feeling, but far too much. With no automatic system kicking in to name and sort and process, every feeling can become overwhelming - a "happy" surprise can lead to a meltdown just as easily as a negative or sad experience.

Emotional education is important, but it's challenging to directly teach a subject that is not usually taught - if you're a "Nypical" (love this term from John Elder Robison), you may think of yourself as very skilled in this area, but it's all automatic processing for you, so you don't actually know how you know what you know (if you know what I mean), and you probably won't be as good at explaining and teaching it as you think.

 
Drawing is a great way to approach the direct teaching of visual cues that connect to emotion:

Here is a quick overview of the small drawn figures I use to teach body language and facial expression:
With a few simple lines, you can "explain" the visual cues of emotion much more effectively than you can with verbal language (in this instance, a picture really is worth a thousand+ words).

This type of teaching results in a gradual learning process - the skills involved in seeing, processing, integrating and understanding the transitory subtle visual cues that code human emotion are incredibly complex, but they are teachable.


Kevin and Adam are both low verbal adults on the autism spectrum, and they have been learning about people and emotions for many years now. See some of their recent drawings:

Happiness for Mr. Bean is a trip to the condo.

Being "shushed" makes Adam feel a bit sad and uncertain.

Sadness for Kevin is an unexpected closure of a favourite store.

Adam draws the unhappy shock of a boy blown back by a lion's roar.


Raymond (Kevin's brother) is excited about graduating from university.

Loving bond between a seal pair.


Dad shows the universal reaction to computer malfunctions.


Being able to freeze one moment in time, through drawing, allows it to be examined and understood. And recently, the beautifully simple drawing animation programs on the iPad have the extra benefit of letting us put these transient emotional moments in the context of a visual timeline:


Understanding and taming emotions is a critical step in developing self-confidence and self-control ... and art is a powerful way to reach and teach when human emotion is the topic.
Pick up a pen and give it a try!
 
Video drawn by Adam on the iPad using FlipBoom Cartoon


Sunday, March 17, 2013

ASD Adults and Life-long Language Learning

One of my strong interests when I went through graduate school for speech pathology was the connection between the brain (neurology) and language learning.

At that time (early 1980's), conventional wisdom in the field of neurolinguistics was that there was a defined window for language acquisition. Scientific studies of people who lost language skills because of acquired brain damage (resulting from something like a head injury or stroke) showed patients had a different capacity for language learning, depending on their age - pre-puberty the brain was plastic and had a good ability to relearn language skills, but post-puberty that learning window seemed to close.

I never really questioned this until several years later when I started working with adolescents and young adults on the autism spectrum. Everyone was post-puberty and many had severely limited verbal language skills, with some completely non-verbal. I found myself mixing my clinical experience with stroke victims (including the use of non-conventional communication means like drawing) into my language development therapy techniques. And I learned an interesting thing: the neuroplasticity necessary for new language learning that was not supposed to exist in this population, did exist. Many of the students desperately wanted to crack the code of conventional communication, and their brains were capable. The limiting factor was more me than them - I could see the potential, but was only beginning to discover the tools that might be effective to bridge that communication gap.

Fast forward a couple of decades and I have more tools in my therapy toolbox - my ASD students have been my teachers, and working with the same individuals over time has taught me some very important things about language learning and ASD:

1. The early years may not be optimal for language learning because neural pathways are developing in a different way at a different pace - if the world is a screaming wall of sound, you can't pick out the words.

2. Written words can help to sort out the string of sounds at the ear, so the person can begin to make sense out of auditory language.

3. Drawing can be a clarifying communication tool that helps therapists/teachers/parents to explain and highlight important information about everyday life, and that can help ASD individuals to explain their perspective and experience of the world.

4. Most importantly, language learning is a life-long process and significant language learning can happen in the adult years, so don't give up trying to reach and teach.

And so for today, an illustration of point #4: 


Adam (age 23) has started writing complex sentences in the past couple of months. We begin with a picture (one of his favourite topics is animals):


Adam then uses Word Mover (iPad app) to write a sentence about what he sees (I love this app because it lets you create sentences like a puzzle). After that, he writes the sentence out and illustrates it with a cartoon drawing:


In this instance, he has spontaneously and purposefully made a lengthy compound sentence (using a clause introduced by a preposition "under ....") to express a complex thought. His picture is a projection of his thoughts about the animals and their feelings - he gives the animals personality and connection (it's not copied, it's "inspired by").

I love to see errors in the sentence construction - they show me that I'm looking at meaningful language learning rather repetition of memorized language "chunks".The spelling error in "hideing" indicates that he's using his own grammatical rules to change verb tenses (add "ing" to the verb for present tense), and the missing word "of" in "family (of) elephants" shows me that he's using a rule he's made about modifying nouns with adjectives (he's used the same structure as "baby elephant").

And that's what gets this speech pathologist excited! Especially when this level of language development was not predictable from his language level in his childhood or early teens. It means that I don't know the ceiling on his learning potential.

.... here's a few more recent sentences and pictures from Adam for your enjoyment:


I'm a big believer in life-long learning. My best advice to parents, educators and therapists would be to let go of any preconceptions about how and when things are usually learned, continually modify your teaching methods to match  the individual's learning profile, and never underestimate the power and plasticity of an intelligent brain ... SB


Note: Recently, someone asked me if there were any neurolinguistic studies connected to the type of therapy I do (using drawing/art to teach communication and language skills). I am not aware of any, but I think it would be an interesting thing to study. If anyone reading this blog knows of related research (or is connected to an academic institution and has an interest in this area), please feel free to contact me via e-mail.

Wednesday, February 27, 2013

iLanguage: creative language teaching using the iPad

The visual touch screen interface of the iPad brings many possibilities for creative language teaching - today I'd like to share with you a few of the ideas (and apps) that I've been trying out in recent therapy sessions with ASD individuals:


1. Action verbs:

Concrete nouns are relatively easy to teach using objects and static pictures. But action verbs are more complicated because they (by their nature) involve movement - so it's hard to be certain that what the therapist thinks they're teaching is what the student is actually learning.

Here's a short video showing Adam creating sentences using Word Mover (a creative writing app that works like magnetic fridge poetry). I would give Adam one or two words, he would add more and put a sentence together. Then we used Stop Motion Studio Pro HD (an iPad animation app) and small clay figures to "illustrate" the sentence meaning - because the end product was a film clip, rather than a static picture, it was easier to see what Adam understood and where he might have gaps in his interpretation of the language meaning:


Here's another video showing Kevin using Word Mover, traditional pen-paper drawing and FlipBoom Cartoon (a different iPad animation app) to illustrate the meaning of a short story he wrote (using one of the words he had just spelled in Montessori Crossword, another app I really like for the structured way it connects written letter patterns to the word sound patterns):


And here's one more video (from Kevin's session today) where I would give Kevin a verb (in Word Mover) and then he would write a complete sentence using that verb. He uses both pen-paper drawing and the FlipBoom Cartoon animation app to illustrate the meaning of the sentences he's written. (note: I am a big fan of grammatical errors - they show me that I'm getting original generative language rather than rote language chunks):


2. Creative Writing:

The Word Mover app is also useful for writing "starters" and inspiration. You write one or more words and then let your student write additional words and arrange the words into a sentence. I'm finding that the "puzzle" nature of the exercise and the ability to modify (add/delete/rewrite) without visible "errors" at the end is encouraging more risk-taking (trying out words that are not well-known, trying to write sentences that are more grammatically complex).

I gave Michael the words "boy" and "horse" - he changed "boy" to "cowboy", and added some more words to make the sentence "A cowboy needs a horse". He drew an illustration by hand (marker on paper) and then he made an entertaining animated short (using FlipBoom Cartoon) of a cowboy unwillingly transforming into a horse. He was calm and focused and expressed a complete (and funny) original idea. Watch the video:


So go ahead, get creative, use the iPad technology to its best advantage - it is a wonderful direct visual interface that can help you make the world of verbal communication less mysterious and more accessible to your students with autism.

Thursday, January 24, 2013

Blending hi-tech and low-tech for optimal learning

The world of technology is developing at the speed of light, and the advent of good touch screens and affordable well-written software that takes advantage of the direct visual interface brings new and wonderful possibilities into classrooms, therapy rooms and family homes. Putting an iPad (or android tablet) into the hands of every child seems like a great idea. But there are challenges: how do you choose good apps? how do you integrate the use of a touch-screen device into your current programming? how do you develop practical aptitude on devices that only existed in the imagination when you were growing up?

Today's post addresses the second challenge: "How do you integrate the use of a touch-screen device into your current programming?" I will give some examples (with illustrations from recent therapy sessions with Kevin and Adam) of how you can use both iPad apps and "real world" tasks together in language learning activities.

First a little background:

Comic Strip stories allow a visual person to create coherent narratives (see blog post ... it's all about stories ). As my students become adept at drawing stories, we use the visual story format as a "scaffold" to teach traditional written language (initially the picture is drawn first and then a sentence is written to go with it, some students have moved on to writing a simple sentence first then adding extra details in the comic illustration).

Scrambled Sentences is another general type of learning activity that I use to teach grammar without the extra challenges of spelling and fine motor (see blog post Scrambled Sentences - using drawing to support language development and teaching video Drawing as Communication - Scrambled Sentences ).

Recently, I broadened both of these learning contexts by adding in some iPad apps.

Comic Strip Story:

Word Wizard is a spelling to speech app by l'Escapadou. On the "movable alphabet" function, you can drag letters to the board and the program will sound out both the individual letters (as you select them) and the letter combinations that you spell. You have the choice of several voices, and you can have the entire phrase/sentence read aloud when you touch the speech bubble icon:


I started Kevin out with the words "mister bean" and he wrote the rest of the sentence (his own words and ideas). Then we switched from high-tech to low-tech, and Kevin drew out the meaning of the sentence to start his Mr. Bean story. Subsequent story events came from sentences spontaneously written by Kevin using the Word Wizard app:


all pictures drawn by Kevin 2013

I'm not concerned about the grammatical errors in Kevin's written sentences, since the point of the activity is for Kevin to express his own ideas using a combination of written language and drawing (I actually like to see grammatical errors - it's an indication that I'm getting novel generative language rather than phrases and sentences copied verbatim from another context)

(and on another note, this looks like a pretty good plan for a post-secondary learning program!)

Scrambled Sentences:

Word Mover is a creative writing app by ReadWriteThink (National Council of Teachers of English). It works on the same premise as magnetic poetry for your fridge. You have the choice of starting with a pre-existing "word bank" that provides you with a collection of words that you can use in your writing, or you can start from a blank screen ("My Own Words"). Additional words are added with the "+" function.

During the same session as Kevin wrote his Mr. Bean story, I set up a traditional "scrambled sentence" using the Word Mover app (I selected and wrote the words, Kevin unscrambled them into a sentence):


Then Kevin drew out the meaning of the sentence using markers and big paper. (the second sentence "Kevin and Raymond are making an art project" was independently written by Kevin, using the Word Mover app, based on the structure of my initial sentence):

drawn by Kevin 2013


The benefit of adding the apps into both of these language activities was an increased ease and flexibility in the writing process for Kevin. I'm hoping that this will stimulate further development in his functional expressive written language.


Two more quick examples of "Scrambled Sentences" from Adam's recent work:

1. Adam's mom gave him the words "boy", "girl" and "snowball" on a Word Mover screen. Adam added more words and unscrambled the sentence to read "The boy and girl is fighting in the snowball.", then he illustrated his meaning using markers on paper. With the picture making his meaning clear, his mom was able to show him (using Word Mover) some minor changes that made the sentence grammatically correct.

drawn by Adam 2013


2. Adam's mom started him off with the words "baby", "dragon" and "fire" on Word Mover. Adam added more words and created the sentence "The baby this is fire the dragon". With the support of the picture Adam drew to illustrate his intended sentence meaning, his mom was able to help Adam modify his sentence (on the Word Mover screen) so that his written words matched what he meant to say.

drawn by Adam 2013

(love the expression on the baby's face)


Technology is a great tool that can be used to enhance the learning environment - it works best when you use it to augment your current effective techniques, rather than using it to replace traditional play and hands-on learning.